Adelaide Surf
Detailed Adelaide surf forecast maps and the latest eyeball surf report from local surfers in the region. Near-shore swell is shown on the map together with the surf forecast rating for spots in Adelaide. Find the best places to surf in offshore conditions by selecting the wind option on the forecast map. Windsurfers and kite surfers can also use this option to find more favorable cross-shore conditions in Adelaide. Our local Wavefinder indicates where some of the best conditions are likely to be found in Adelaide over the next 7 days. Surf photos from Adelaide and reviews of the best spots and surfing conditions have been provided by local surfers.
Adelaide Surf Forecast map for predicting the best wave and wind conditions across the region. For surfers, the map shows the most powerful swell tracking across near-shore open water and not the peak waves experienced by boats out at sea. Move your mouse over the ocean swell symbols or the surf breaks on the coastline to see a more detailed surf forecast including wave period and wind conditions. The forecast updates every 6 hours and most live weather reports update every hour. You can animate the Adelaide Surf map or show live wind and wave conditions as reported from wavebuoys and local weather stations. Surf breaks shown along the Adelaide coastline are also listed below.
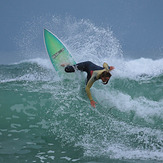
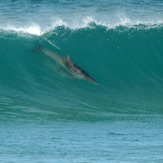
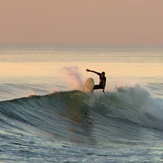
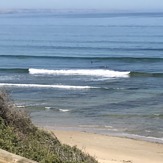
Adelaide Photos

Adelaide Wavefinder
Sunday 2 | Monday 3 | Tuesday 4 | Wednesday 5 | Thursday 6 | Friday 7 | ||||||||||||||
Night | AM | PM | Night | AM | PM | Night | AM | PM | Night | AM | PM | Night | AM | PM | Night | AM | PM | Night | |
Best forecast wave conditions in Adelaide | |||||||||||||||||||
Wave Height (m) Direction Period (s) | SSW 16 | NNW 5 | WNW 5 | W 5 | WSW 5 | WSW 5 | WSW 4 | WSW 8 | WSW 8 | SSW 10 | SSW 15 | SSW 14 | SSW 17 | SSW 16 | SSW 16 | SSW 17 | SSW 16 | SSW 17 | SSW 16 |
2110 | 72 | 64 | 97 | 62 | 24 | 17 | 6 | 6 | 451 | 309 | 364 | 414 | 568 | 463 | 1405 | 1324 | 1878 | 1261 | |
Wind (km/h) | |||||||||||||||||||
Wind State on-shore cross-onshore cross-shore cross-offshore off-shore glassy | off | cross | on | on | on | cross-on | cross-on | cross-on | on | off | cross-off | glassy | off | cross-off | cross-off | cross-off | cross-off | cross-off | cross-off |
High Tide | 6:22AM1.63m | 6:18PM1.93m | 6:46AM1.69m | 6:44PM1.78m | 7:11AM1.72m | 5:43AM0.44m | 4:13PM0.31m | 6:25AM0.47m | 7:30AM0.49m | ||||||||||
Low Tide | 10:38PM0.02m | 12:09PM0.17m | 00:39AM-0.02m | 12:41PM0.19m | 00:58AM0.06m | 1:14PM0.27m | 10:51PM0.05m | 11:45AM0.22m | 10:44PM0.04m | 10:26PM0.02m | 10:04PM-0.02m | ||||||||
mm | — | — | 1 | — | — | — | — | — | — | — | — | — | — | — | — | — | — | — | — |
Max °C | 11 | 12 | 13 | 12 | 12 | 12 | 11 | 11 | 11 | 9 | 12 | 12 | 10 | 13 | 14 | 11 | 13 | 14 | 12 |
Min °C | 9 | 9 | 11 | 11 | 12 | 12 | 10 | 11 | 10 | 8 | 9 | 11 | 10 | 11 | 11 | 9 | 10 | 13 | 11 |
Chill °C | 9 | 9 | 10 | 9 | 10 | 10 | 9 | 10 | 10 | 9 | 12 | 12 | 10 | 12 | 14 | 10 | 12 | 13 | 10 |
— | 7:11 | — | — | 7:09 | — | — | 7:09 | — | — | 7:09 | — | — | 7:07 | — | — | 7:07 | — | — | |
— | — | 5:34 | — | — | 5:34 | — | — | 5:35 | — | — | 5:35 | — | — | 5:36 | — | — | 5:37 | — | |
Swell 1 Height (m) Direction Period (s) | SSW 16 | W 8 | NNE 5 | S 18 | WSW 9 | WSW 9 | WSW 8 | WSW 4 | WSW 8 | SSW 10 | SSW 9 | SSW 14 | SSW 17 | SSW 16 | SSW 16 | SSW 17 | SSW 16 | SSW 17 | SSW 16 |
2110 | 1 | 7 | 6 | 8 | 15 | 6 | 4 | 6 | 451 | 189 | 265 | 414 | 568 | 463 | 1405 | 1324 | 1878 | 1261 | |
Swell 2 Height (m) Direction Period (s) | — | S 16 | S 15 | — | — | — | — | WSW 8 | W 5 | SSW 20 | SSW 15 | SSW 9 | SSW 13 | SSE 9 | SSW 19 | SE 8 | SSW 19 | S 8 | — |
— | 5 | 4 | — | — | — | — | 6 | 2 | 234 | 309 | 99 | 186 | 26 | 248 | 14 | 584 | 1 | — | |
Wind waves Height (m) Direction Period (s) | N 4 | NNW 5 | WNW 5 | W 5 | WSW 5 | WSW 5 | WSW 4 | — | — | — | — | — | — | — | — | — | ENE 7 | E 7 | ENE 3 |
9 | 72 | 64 | 97 | 62 | 24 | 17 | — | — | — | — | — | — | — | — | — | 18 | 4 | 2 | |
Sea °C | 14 | 14 | 14 | 14 | 14 | 14 | 14 | 14 | 14 | 14 | 14 | 14 | 14 | 14 | 14 | 14 | 14 | 14 | 14 |
Diff °C | |||||||||||||||||||
 Nearest